|
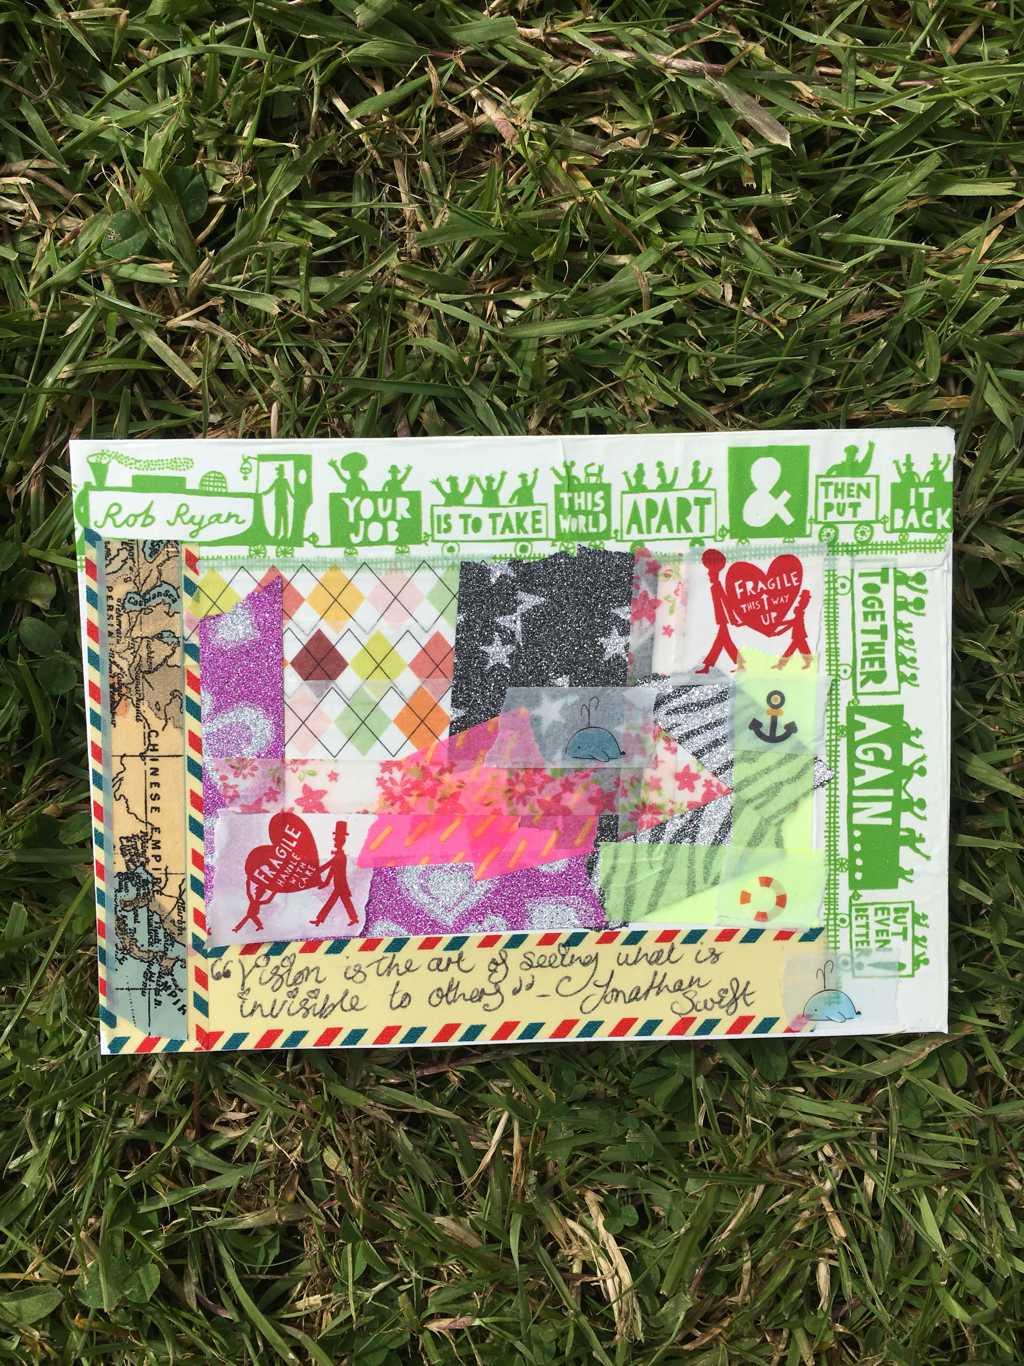
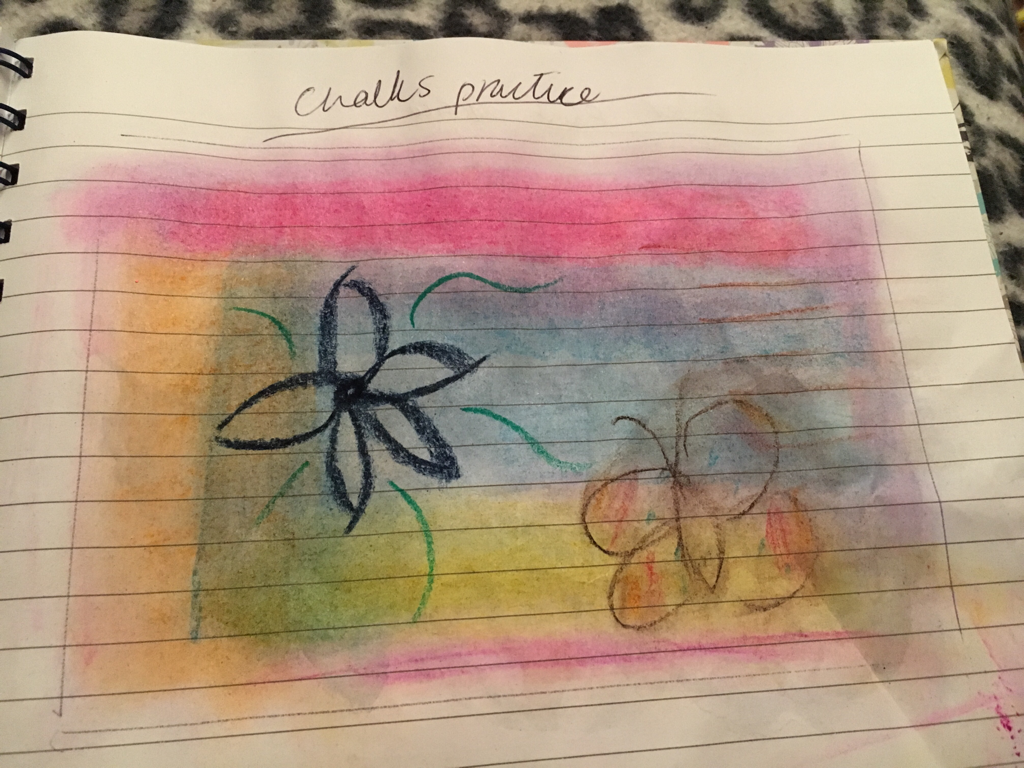
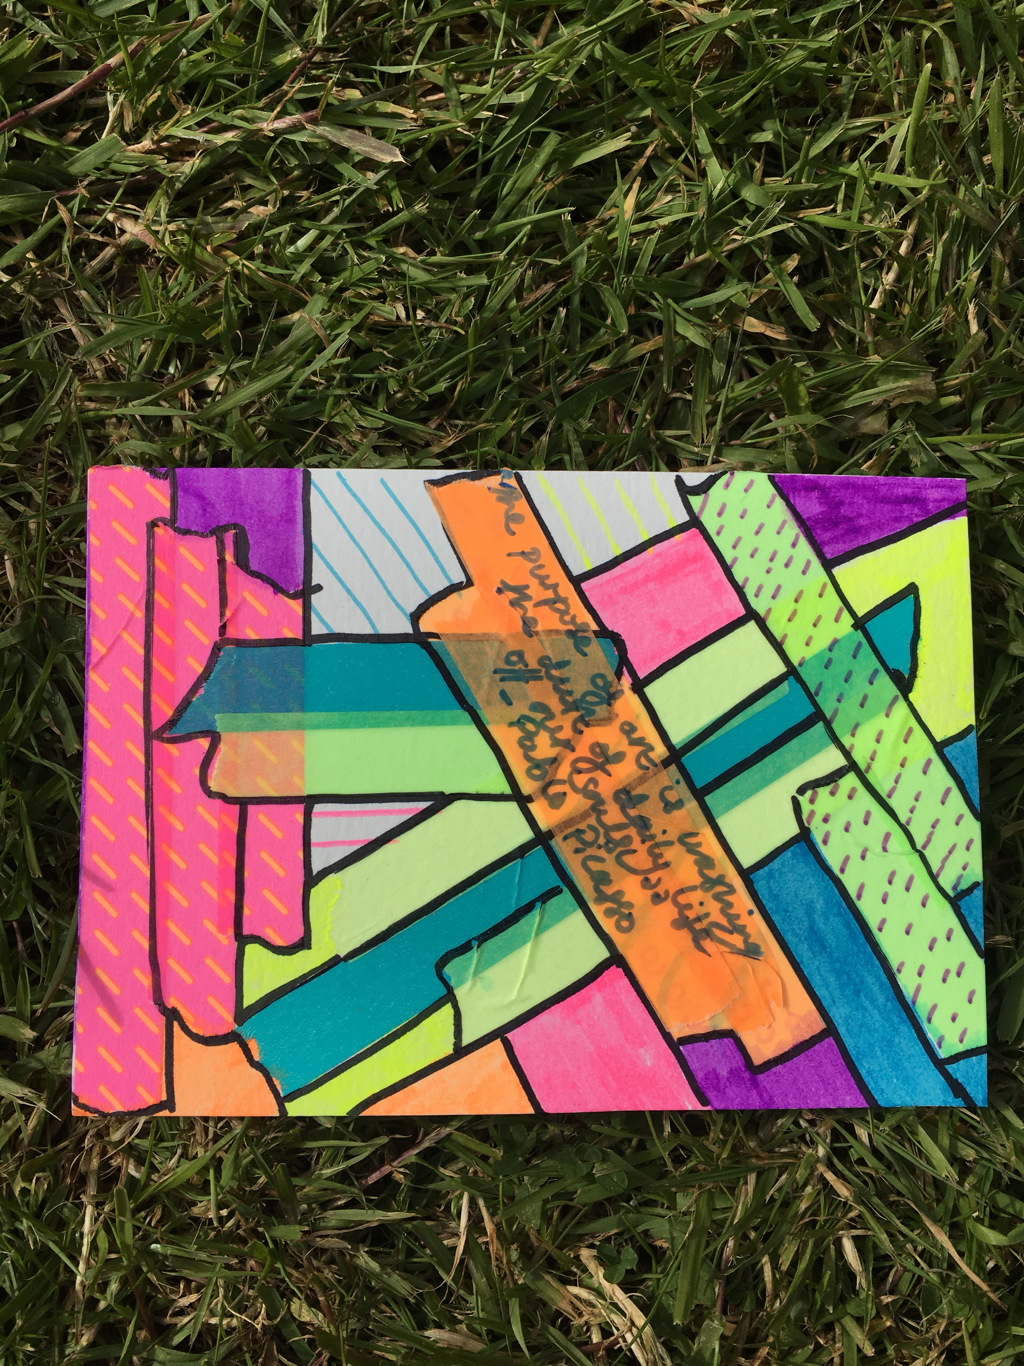
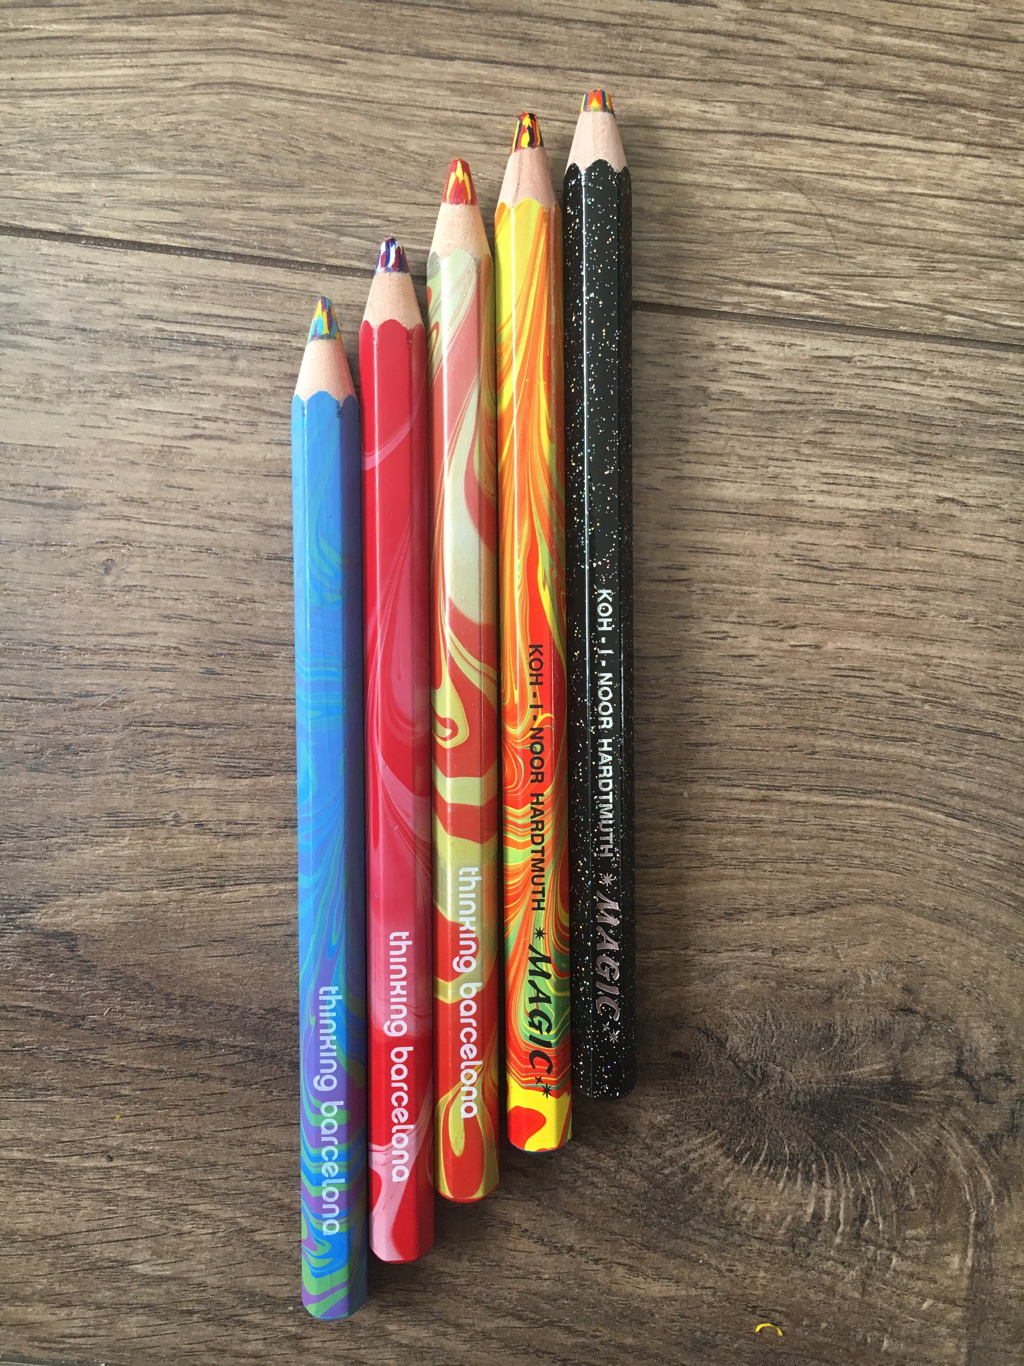
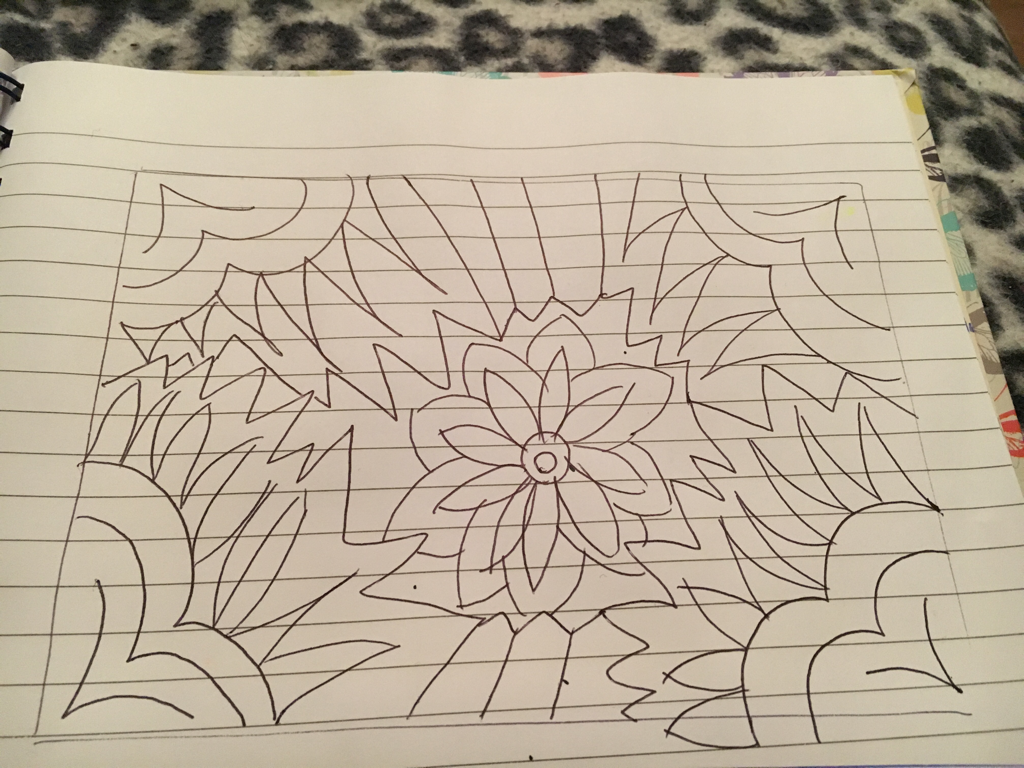
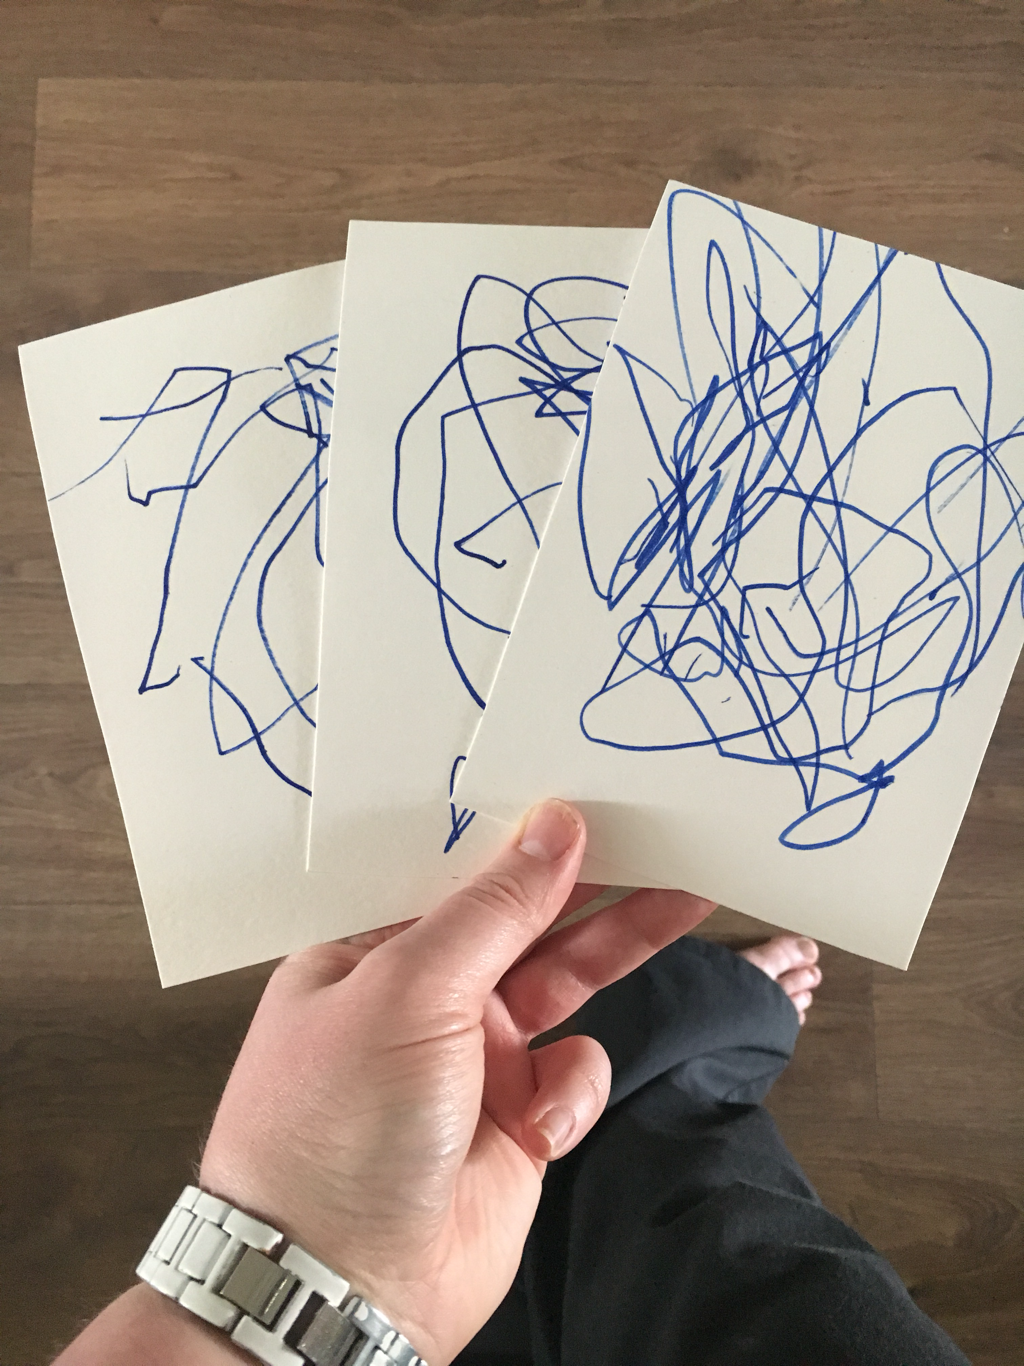
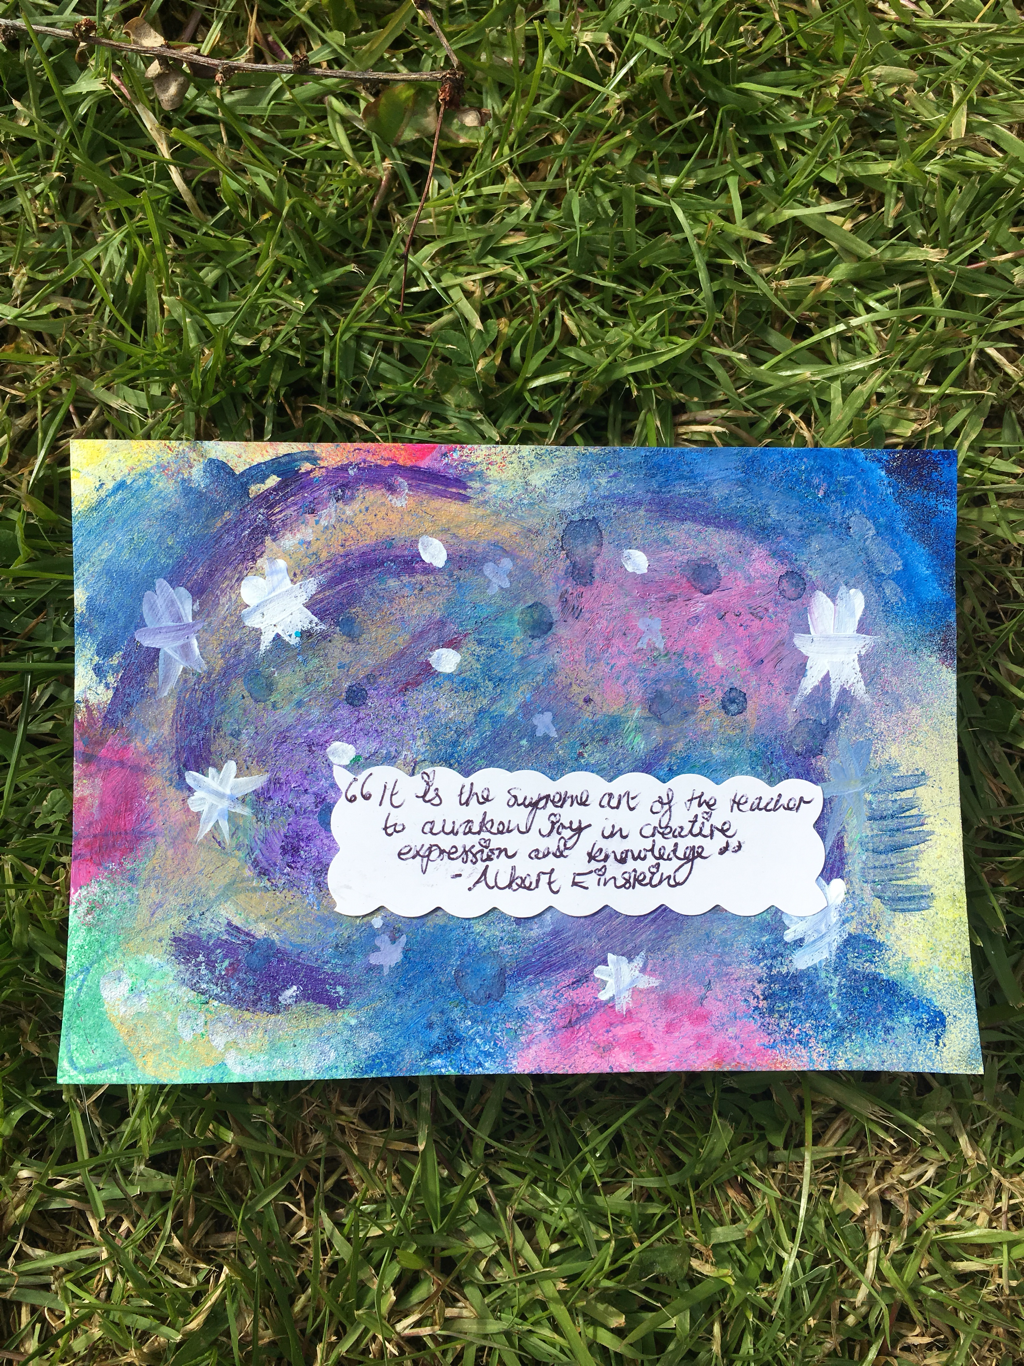
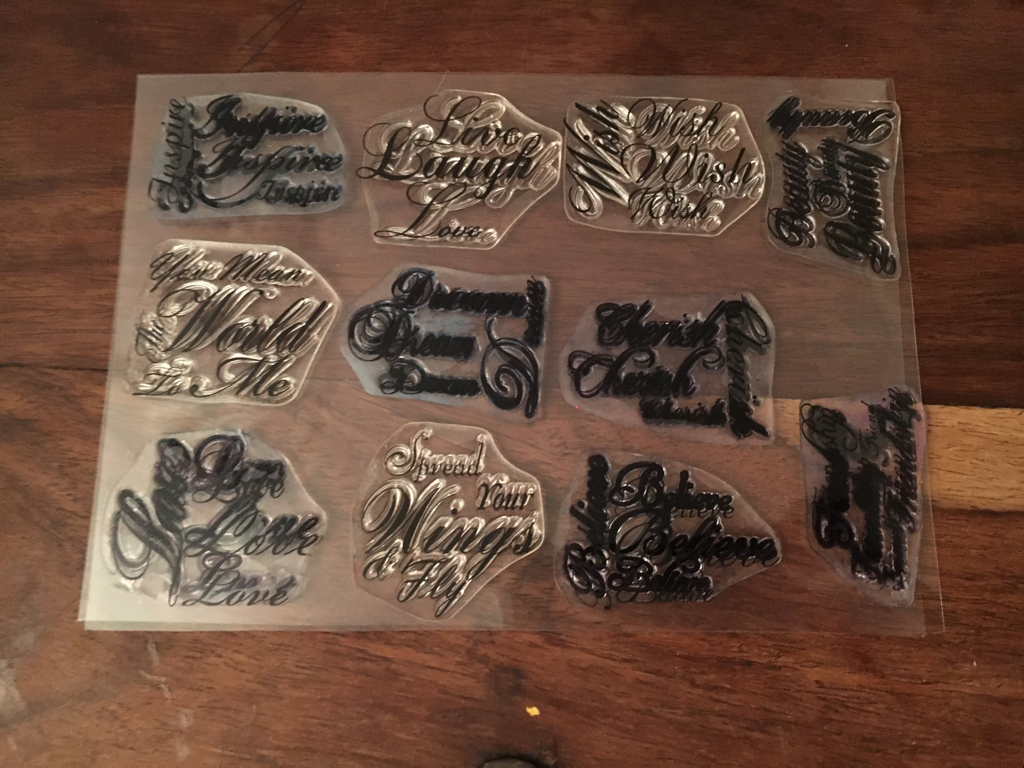
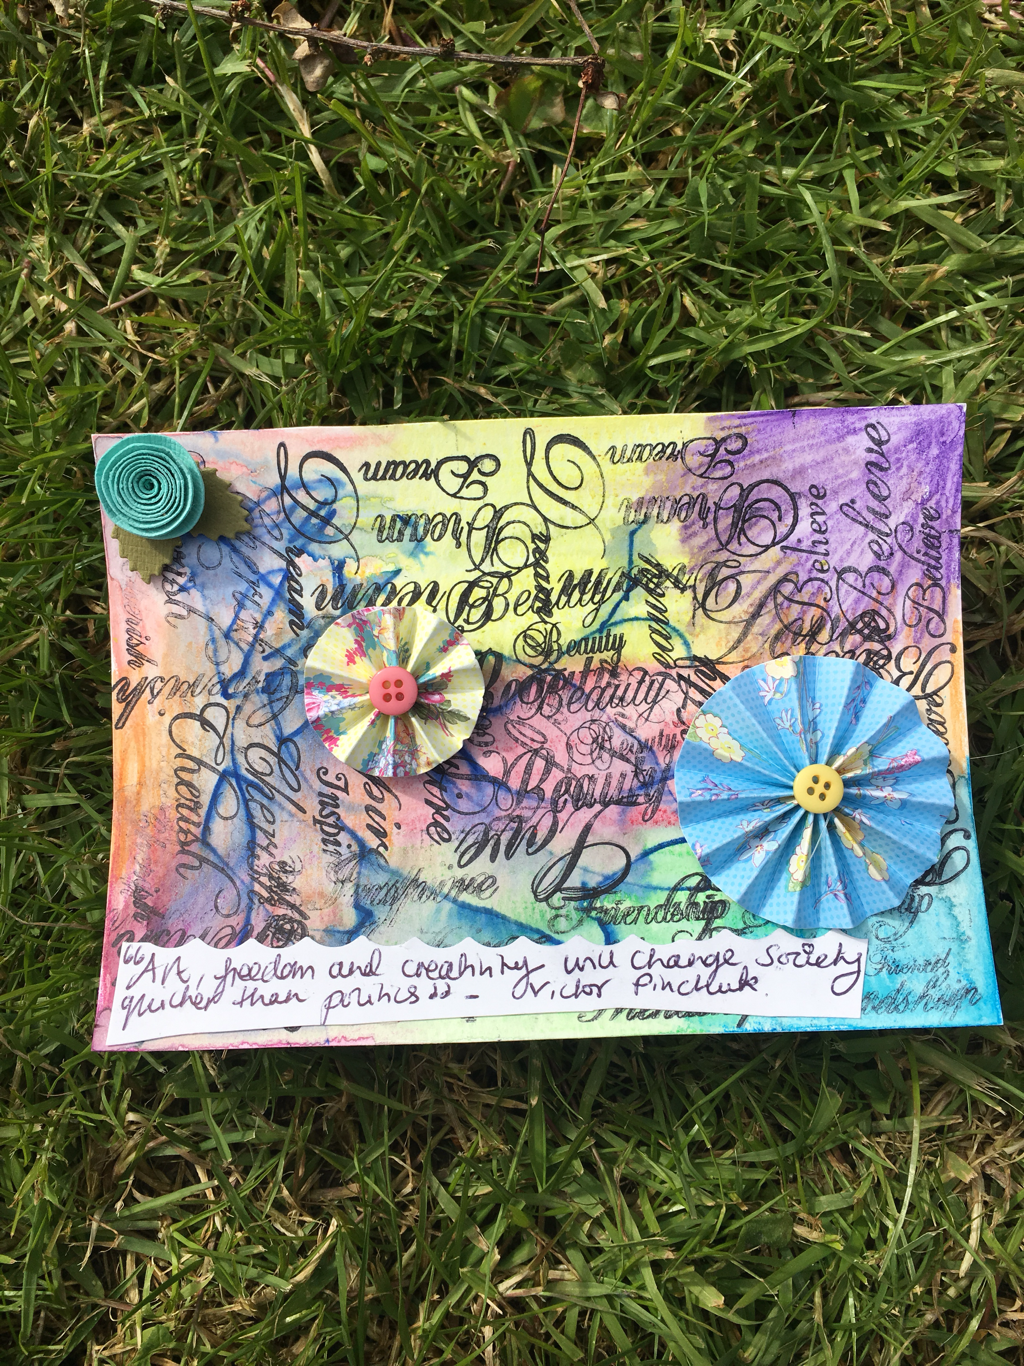
Last year, Spring 2016, was the first time I participated in an art swap. It was such a fulfilling experience that it was a no-brainer to take part again this year! I wanted to show you my finished cards and my thought process behind my designs and ideas. One of my fave art journalling creative bloggers, Ihanna, organises a DIY art postcard swap every Spring and Autumn. When I first came across her I fell in love with her style and didn't hesitate to pay the fee to take part. Doing a swap is great for a few reasons. If you are a fellow creative like me, it gives you focus to channel it and a purpose to create. Knowing there is a deadline and people are waiting on you, depending on you to receive their postcard. This gives that little bit of gentle pressure and moral decency to make completing the project a priority in this busy, noisy world of distractions. Last year my starting point was a bit easier. Pick a profound quote or single empowering word such as 'faith' and design each card around the word or quote. Expressing it in art and how I imagine that to look like. Since it was my first swap and not feeling very confident on my artistic skills, it was best to keep it simple! As you can see in the photo above, I used butterflies for Hope and Grace. I link this to my faith in God, His creation of these creatures, so beautiful, so free, season of summer, sunshine, flowers in bloom. A big reflection of grace and hope. That no matter what we go through, there will always be a season of summer and fruitfulness. Even if it feels like sometimes, we go through the wilderness with season upon season of winter! Whatever happens, flowers still bloom, the sun still rises and life goes on. So, this year, second time around, I needed to step up a gear and build on my experience from last year. You can see my signature style of colour and quotes coming through! I decided to go for, specifically, art quotes. ''Every artist dips his brush in his own soul, and paints his own nature into his pictures'' - Henry Ward Beecher Everyone loves a quote so I thought I'd zone in on what art and creativity mean. I then decided to experiment with different mediums/styles/themes and do a card with a general theme or only one or two different mediums. Themes and StylesSo, a brief outline from the numbered photo of postcards from this year: 1. Washi tape. 2. Decoupage using a Joe Browns mail order catalogue (my fave clothes shop, colourful, quirky, full of prints, very me!). 3. Chalk pastels and calligraphy ink drawings. 4. Poster paint. 5. Neon. 6. Self adhesive fabric and black Sharpie pen. 7. Hand drawn colouring in page. Coloured in using Papermate Flair pens and 'magic' multi colour pencils. 8. Galaxy. 9. Glitter. 10. Watercolour pencils, craft stamped words and pinwheel toppers. Technique1. Washi tape. I started with what felt like the easiest ones first. As I mentioned, I'm not that confident with my painting and drawing skills. So starting the first two with sticking and glueing felt easier. For the washi tape, I picked my favourites out of my craft stash and just played around with it. Here's a photo of the first two drafts before settling on the third final design. 2. Decoupage. If you are a fan of scrap booking (of which I have an easy tutorial you can follow, here: http://www.justcreativejulia.co.uk/blog/how-to-start-scrapbooking) then you will love decoupage! I often use clothes catalogues for decoupage as the paper is thin and will best absorb the pva glue. Plus, the explosion of creativity in the fashion world over the last few years gives a wide assortment of prints and patterns to literally, cut out and paste into your creations. Aztec, floral, tribal, animal, geometric, neons, pastels, brights. It's all there waiting to be used for your next project! For this postcard I chose Joe Browns as I feel they reflect my personality the best. 3. Chalk pastels and calligraphy ink drawings. For this postcard I wanted to use chalk pastels but quickly realised I would be left with just a pretty, colourful background! So I had to re-think how else I would fill the space to give it more interest. The answer was simple black ink drawings. I'm no fine artist which I re-iterate many a time through my blogs! But I've always said, the more you do something, the more you can refine it. Not everyone is blessed with a natural ability to draw perfectly. But! Everyone doodles! What do you doodle the most? Mine is flowers, butterflies, hearts. Girly things really! So I armed myself with some black calligraphy ink, my calligraphy pen and drew some refined flower doodles! I was quite pleased with the result! This quote has to be my fave too! 4. Poster paint. This technique I actually discovered whilst painting with Eli, my three year old! I like to include different tools to mix it up and make it more interesting for him. Such as using a toothbrush, sponges and a plastic fork! This one was the fork! All you do is choose about 2 or 3 colours of poster paint that will compliment each other, squirt them over the page in dollops and swirls. Then use the fork and your finger to create wavy lines and smear it all together in a beautiful marbled effect. So simple and so pretty! 5. Neon. As you can see from my blog design, I love rainbows, colour and brights! So neon as a theme was an onvious choice! (I was born in the 80's also so maybe this has a big influence on my love of neon!) All I used for this was my neon washi tape and some highlighter pens. I played around with some diagonal lines/geometric style patterns with the washi tape as a starting point. Then just continued the pattern with my pens. I used a black Sharpie just to go around some borders for some definition. Job done! 6. Self-adhesive fabric. This one I kinda stared at my pack of fabric for a while deciding how I could bring it together. I decided to start easy again, with a background of different strips using the stripes and spots. Then simply went to my go to, butterflies and flowers! I just drew them straight on the fabric, cut them out and arranged appropriately. I also used triangles to look like bunting, some zig zag shapes and circles from small to large. The result looks a little pop art! 7. Colouring in page. Another trend that's been around for a while now. The adult colouring in page! In one of my Crafts Beautiful magazines, there was a tutorial for making one into a greetings card. So I took the idea for my postcard! I simply started with the four corners and worked inwards. With the flower in the middle. I coloured it in using my Papermate flair colouring pens and some very cool 'magic' pencils. They are amazing! I first discovered them at Barcelona airport back in 2012! (Back in the crazy days before Eli and we were still able to go to the mad festival that is FIB! Bennicassim! Imagine Glasto but with the gorge weather of Spain! And Spainish timings. So would start about 9pm, headliners on about 1am and finished about 6am!!). You can see the ones bought at the airport have 'thinking Barcelona' on them. The good news is, you don't have to go to Barcelona to snap these up! Just search 'magic pencils' on Ebay and away you go! They have about 3 colours blended into one pencil! Very exciting to use! 8. Galaxy. This one came about because my three year old, Eli, got hold of my ready to go postcards and felt the need to join in with some mark making! As you can see from the photo! So I had to come up with an idea (or 3!) that would cover it! The galaxy print is so easy once you get the hang of it. It's basically layering and sponging. Decide what colours you'd like (I went for a more pastel theme) and dab on with a sponge. Keep going until you're happy with it. You def need white or your colours will not show up if using black as a background! Finish off with some white spots and stars. If you fancy this look on your nails, don't forget to check out my diy here: http://www.justcreativejulia.co.uk/blog/galaxy-diy-nail-art And if you fancy buying yourself a galaxy skirt, check out mine in this diy tutorial for a no sew sequin top: http://www.justcreativejulia.co.uk/blog/diy-sequin-party-top-thrifty-thursday Mine came from Shadowplaynyc on Etsy. If you do a search on Etsy for 'galaxy skirt' you'll get loads of search results! I bought mine years ago, so these guys were pretty much the first to be doing it! I also own some fab galaxy leggings from www.onlineleggingstore.com. Here's a link to my Instagram where you can see me modelling them after some interval running! https://instagram.com/p/BR1OcNVla0e/ 9. Glitter. Not only do I love colour, neon and print, I am also a huge magpie! Give me bling baby! Another idea I needed to cover up Eli's mark makings! I used glitter washi tape for the border, sequin thread in the middle, and kind of made a cross outline. I then filled in the corners with glitter background cards, ripped to give a rough look. I filled the gaps with E6000 glue (strong enough to withhold going through the postal system!) and loose glitter, chunky and fine cut. Lastly I added a few gems to finish off. I was in awe watching it sparkle! 10. Watercolour pencils, craft stamped words and pinwheel toppers. The last one! I decided to let Eli's mark makings show through on this one and incorporated it into the design. So I used watercolour pencils for another colourful background. Then used my word stamps to fill the card with script. I've used this technique for wedding congratulations cards. As the words reflect a marriage perfectly. I finished off with pin wheel toppers and a fabric rose topper. I hope you enjoyed finding out my process and techniques. Please do get in touch if you joined in the swap this year! What theme did you go for? Were they all the same or all different? What's your favourite thing about participating in art swaps? Send me a blog link or some pictures of the cards you sent and I'd be happy to feature them!
And if you fancy joining in with Ihanna for her next swap, it'll be in the Autumn. Go here for more details: www.ihanna.nu/postcard-swap.
0 Comments
Leave a Reply. |
Hello there!I'm Julia, Just Creative Julia, jolly pleased to meet you! Welcome to my creative lifestyle blog, established 2014. My creative journey in discovering my authentic self as a neurodivergent woman.
Embracing the Neuro Spicy! Here you will find many different topics centring around creativity, deep thoughts, mental health, food and more. Archives
May 2024
Categories
All
|











 RSS Feed


