|
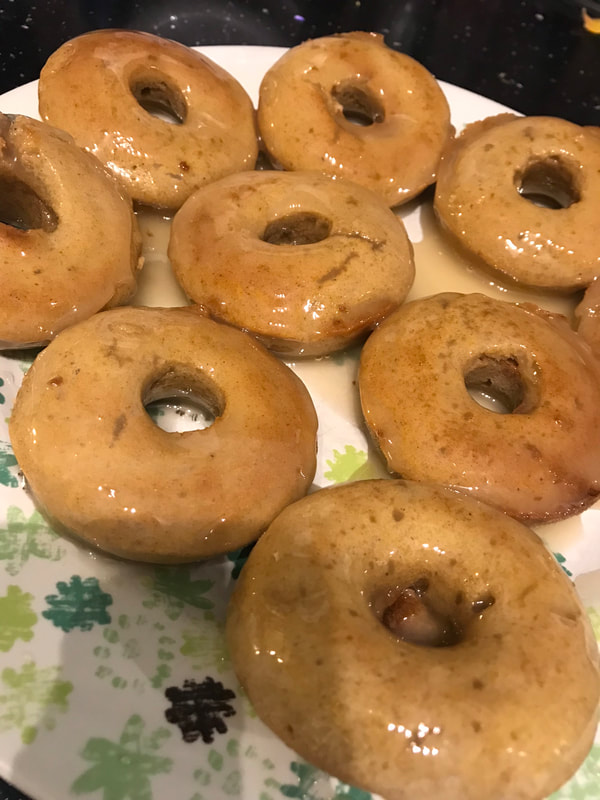
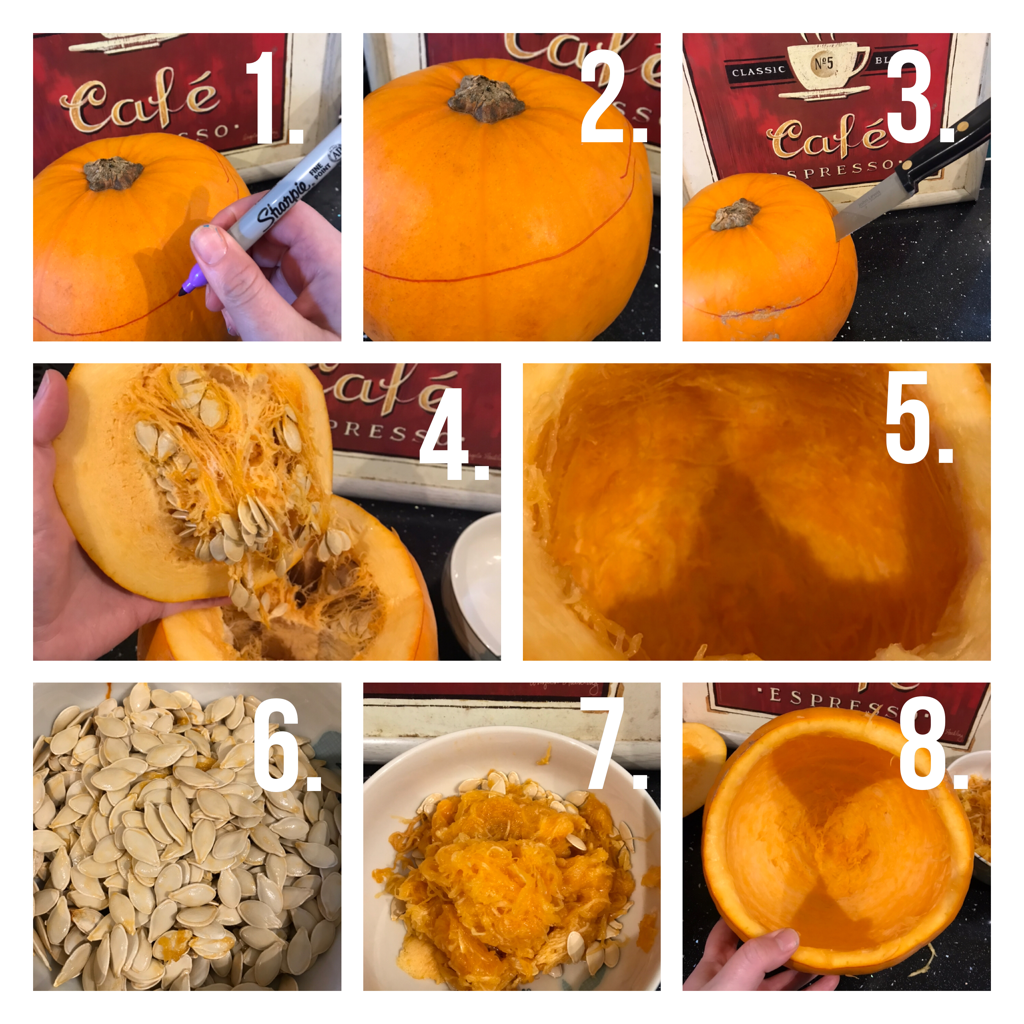
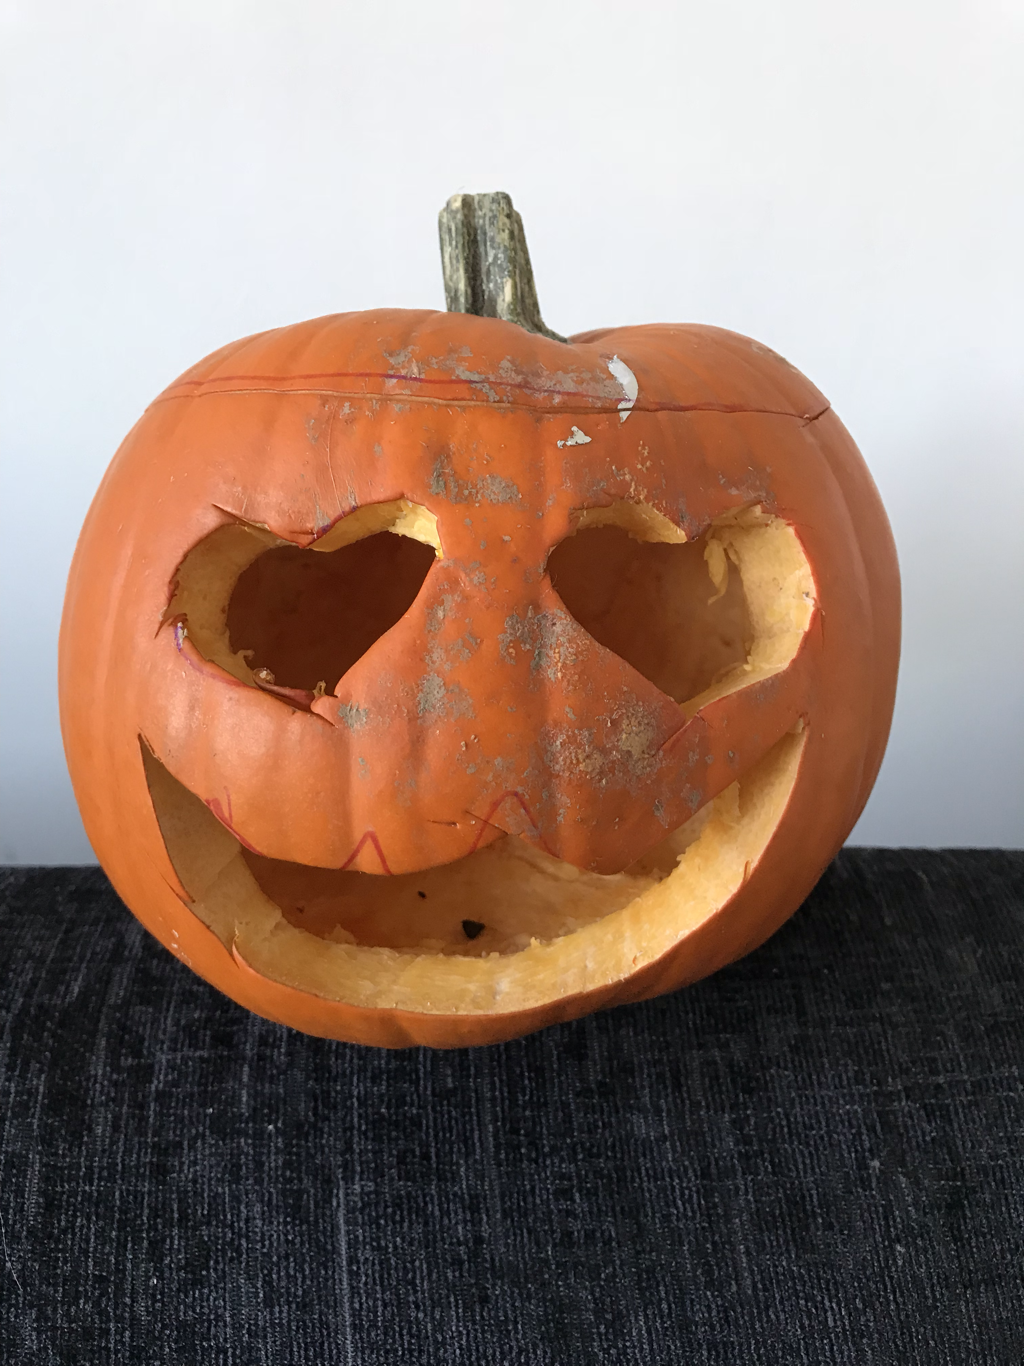
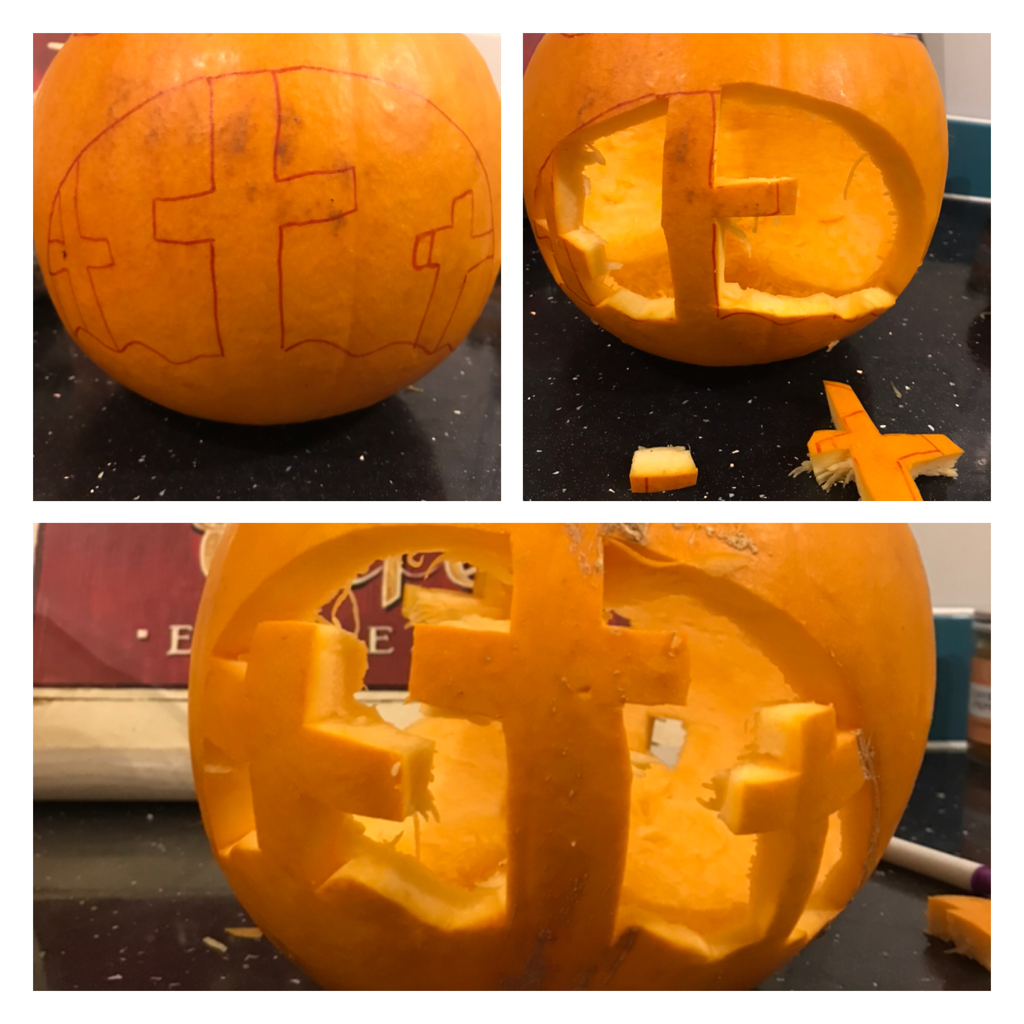
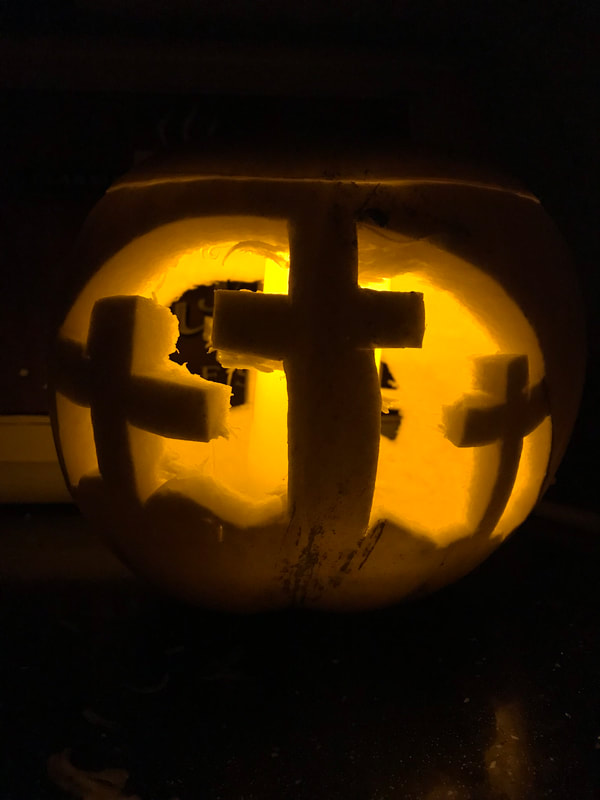
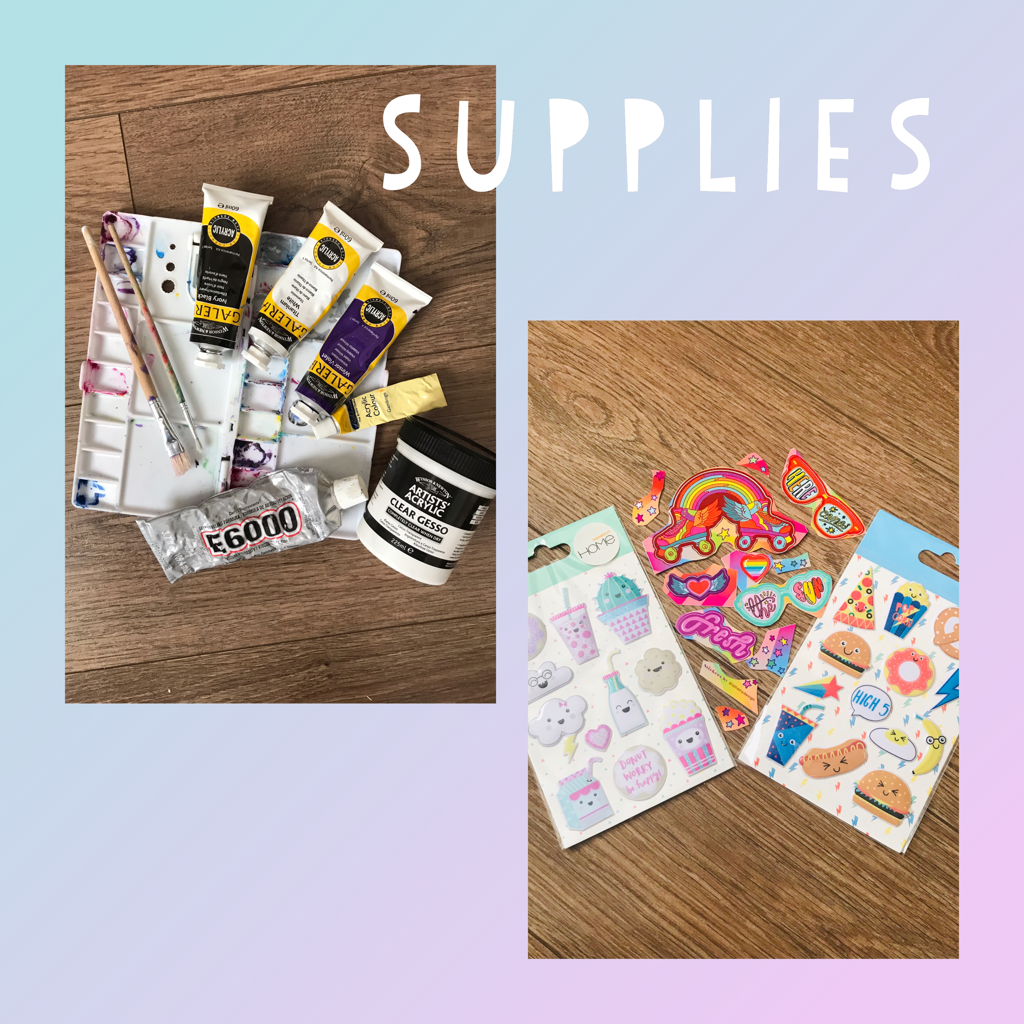
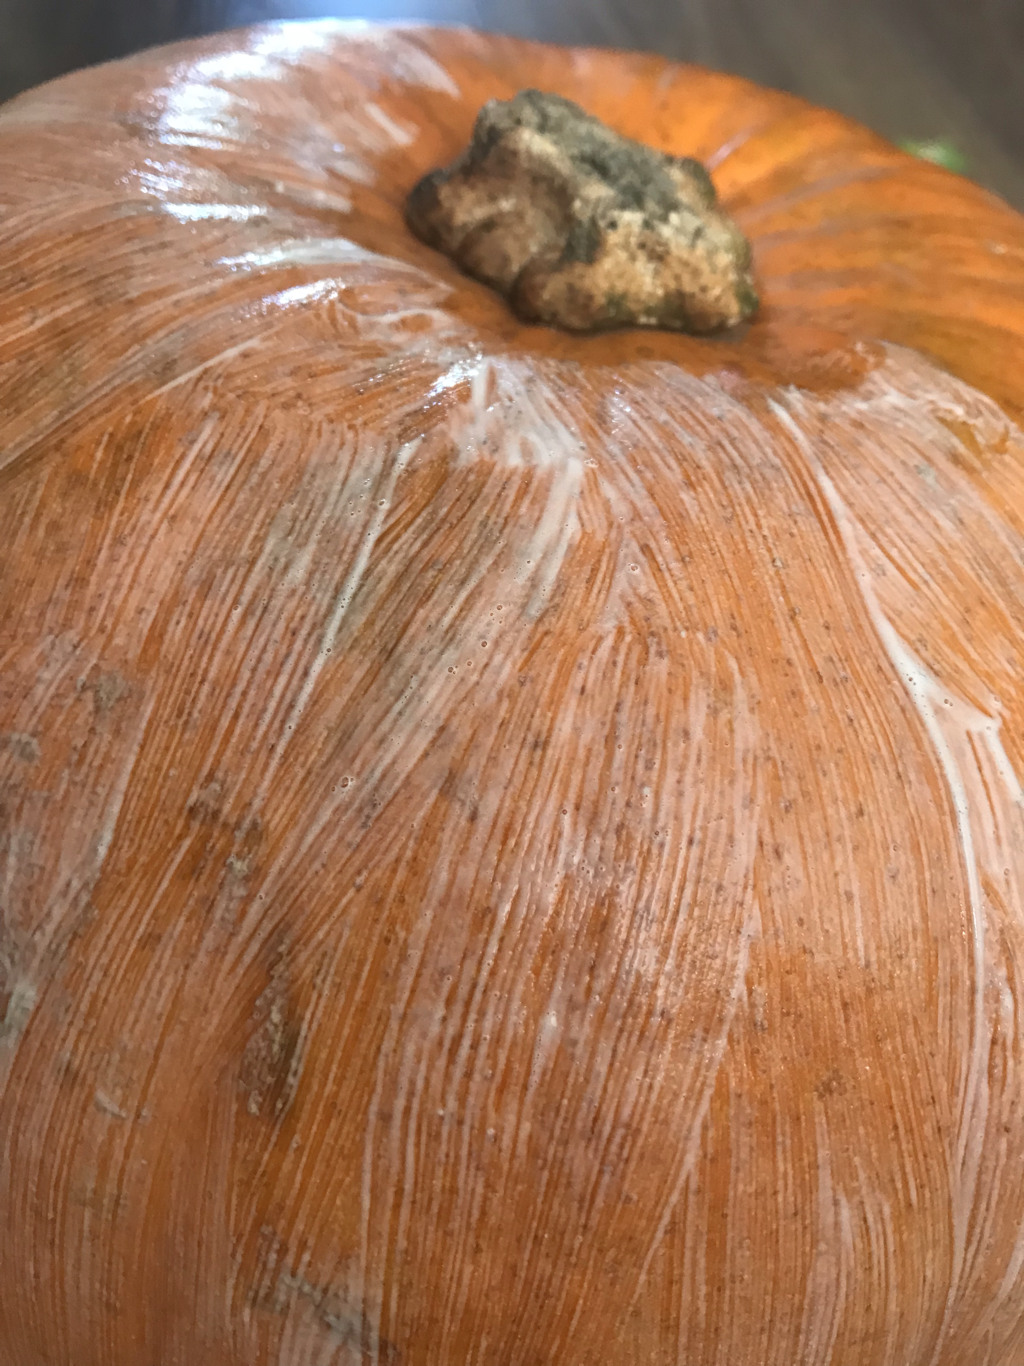
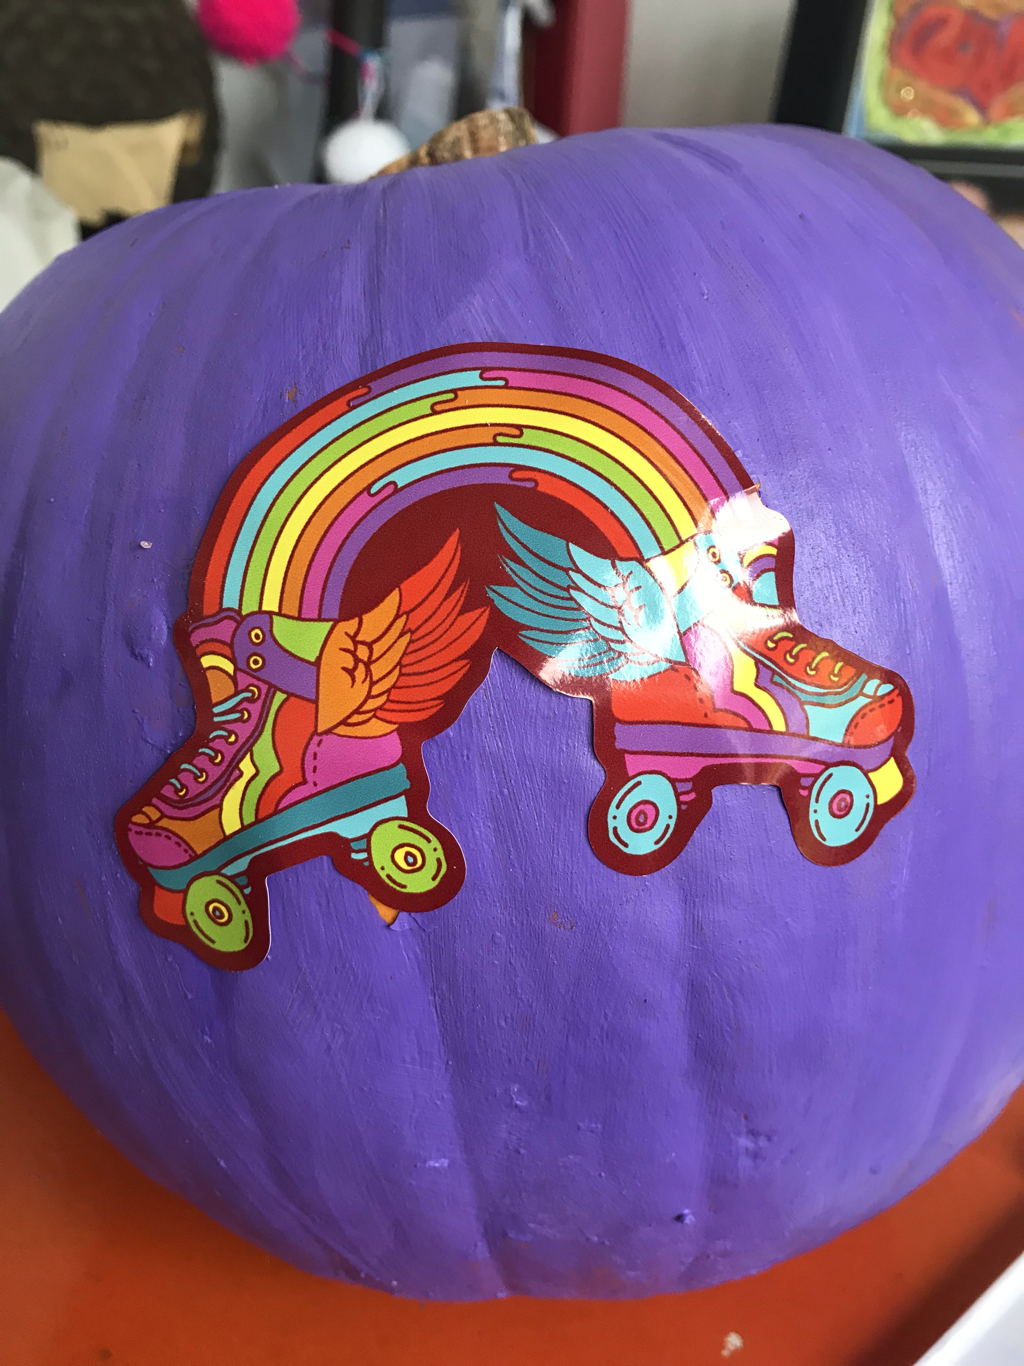
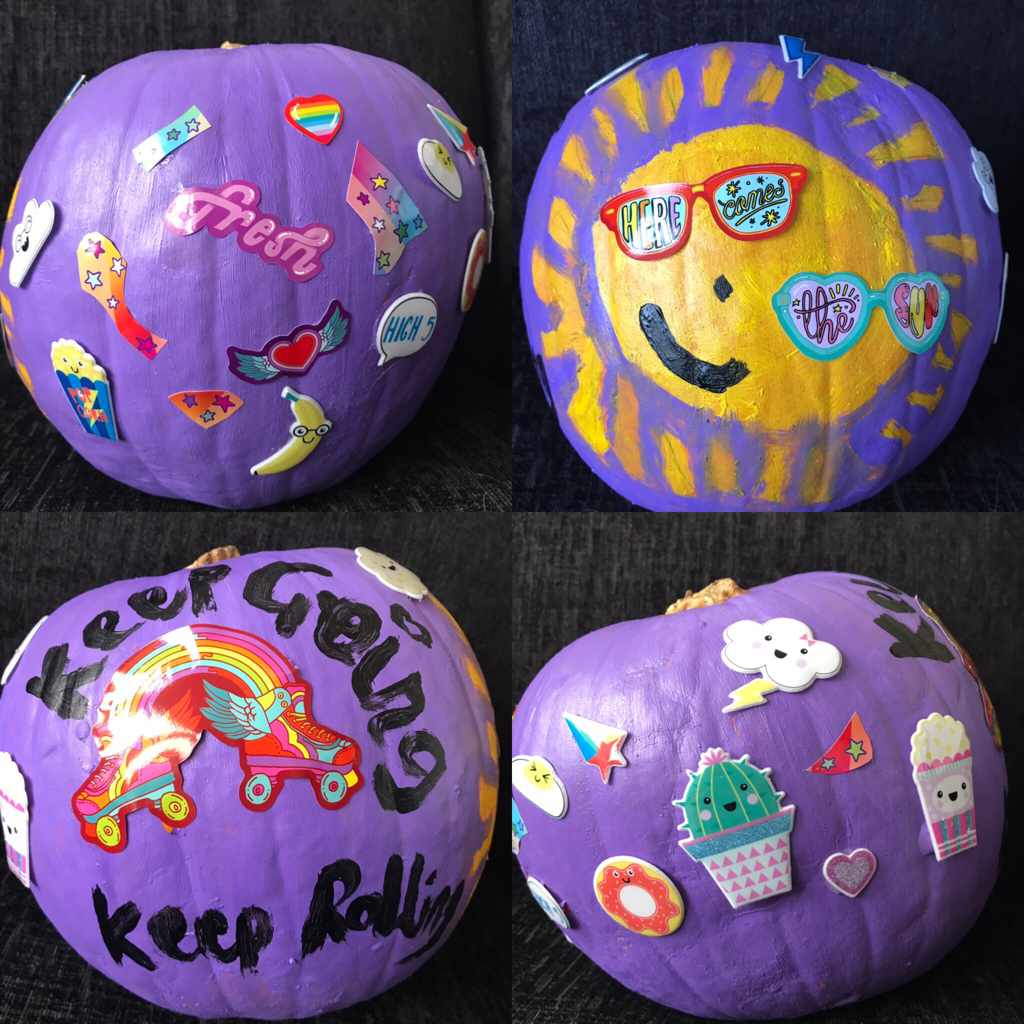
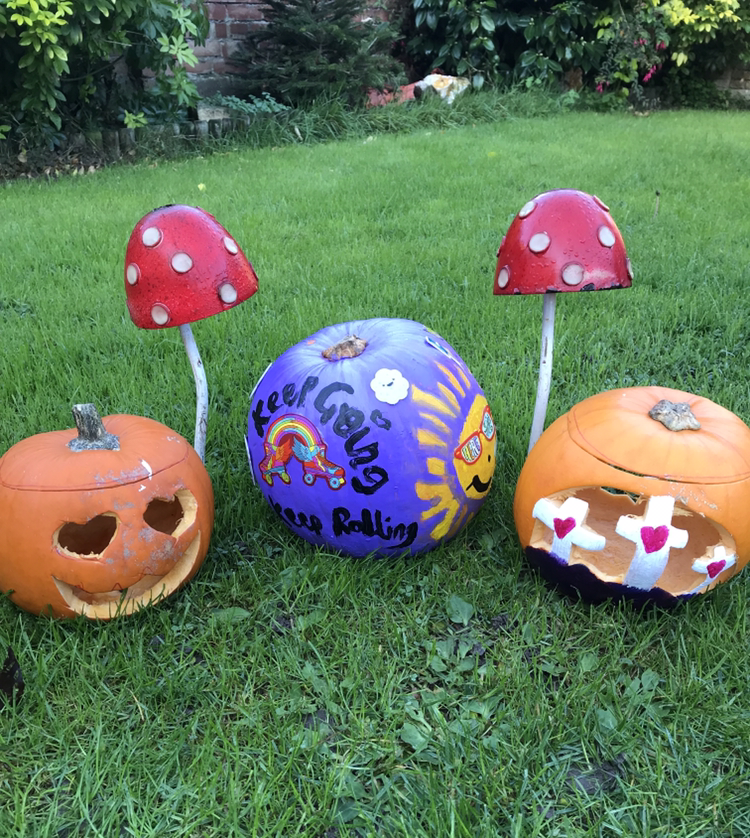
Halloween is here! Ever the last minute queen, I thought I'd do a post on decorating your pumpkins. As mentioned in my previous post, 'should Christians celebrate Halloween?', I've been really getting into it this year. This past weekend was a flurry of pumpkin carving then making some yummy pumpkin recipes with the flesh. I have a pumpkin puree creamy pasta recipe coming up so watch this space! I also found the best doughnut recipe! OMG it was to die for! Pumpkin spice doughnuts with a maple glaze. My overeating struggles were not helped by these and I pretty much devoured them within two days (cue the face palm emoji!). But boy did I enjoy them. Found them on the Olive magazine food website after googling pumpkin recipes. It was within a bigger article containing savoury dishes, desserts and also pumpkin seed recipes such as granola. Check it out here. In this tutorial I will cover the steps to prepare your pumpkin for carving and best practice for carving your designs. I will also go through an easier diy for painting and then using stickers for some added fun! First up, the carving! How to Prepare Your Pumpkin for CarvingSo you don't necessarily have to hollow it out but I preferred this option as it meant I could scoop out the flesh while it was still fresh and use it for the recipes as mentioned above. I'm not entirely sure how long the flesh would last if you wanted to carve it up and then cut it all up for cooking once Halloween is finished. I tried Googling to find the answer but it wasn't very conclusive! It may be really obvious but since this is the first year of trying my hand at pumpkin decorating, I am a bit clueless! 1. Using a dry wipe marker, draw a line around the top of the pumpkin to create a lid. Don’t make the mistake I did in using a Sharpie! Because if you’re carving for the first time, it’s hard to be precise and perfect! So I was left with permanent outlines where I’d not cut around them accordingly! 2. Using a sharp knife, simply cut around the top of the pumpkin, following your line as a guide. I found it quite tricky to get the right kind of curve going but soon found my flow. 3. Pull your lid off and cut away all the flesh and seeds. 4. Next, scoop out the seeds and fibres from the middle. You can choose to keep or discard the actual seeds. I shall be back onto Google later to work out what to do with mine! 5. Using a combination of your knife and a spoon, cut and scrape away to get as much flesh as possible. For my creamy pasta recipe I managed to yield about 500g from my pumpkin which was the perfect amount to create a pasta sauce to serve 4. 6. That's it! Next onto the actual carving! Design IdeasFor my carvings I obviously wanted them to be Christian friendly and not convey anything evil. My one concession to this was buying a £5 pumpkin from Wilko that had a more evil looking face than I'd like... (shown in the header picture) but... it was covered in copper glitter! I love a bit of bling! I actually wanted the silver holographic glitter but I was with my 4 year old at the time so I let him choose! My Google image search was simply 'Christian pumpkin carvings' and I found one with 3 crosses that I really liked from the Daring Daughters website. I also really wanted to incorporate a design using hearts. So just settled on a face image with hearts for eyes, like the heart eyes emoji. I just made the mouth a bit pointed to still be slightly creepy. I feel like it's ok to be a little creepy as I know that, in my faith, Jesus defeated death for me. So I can laugh in the face of it! I just will not abide anything that is disturbingly scary. Such as those idiot killer clowns or people going round with toy chainsaws and hockey masks!! A bit too much if you ask me! With carving it's pretty much draw on your design, then carve it out! You can also have an added bonus of a craft activity with your kids by using the cut out shapes as paint stampers. The hearts I cut out worked particularly well for this. With the three crosses design, I did it wrong to start with! As this one was a bit different in that you are cutting out the negative space around the crosses. So I cut too far on the cross on the right and was left with too much blank space! And managed to cut off a bit of the cross in the middle too! As you can see in the photo collage! However, I didn't let these mistakes put me off! After all, I had the other side to work on! So I spun the pumpkin around and tried again. With much better results! I think it looks pretty good with the lights shining through. I bought some battery operated LED candles especially for the occasion. Next, painting your pumpkins. I had three pumpkins altogether. One I carved with the heart eyes face, one with the crosses and the third, the biggest, I've painted. I saw a post on Instagram from Liz Harry Design where she'd painted her pumpkin lilac and decorated it with her limited edition Halloween stickers. For my painted pumpkin I totally copied her! I had some of her stickers anyway (not the Halloween ones though) that I received free with a jewellery purchase of her fab acrylic earrings. So I sketched out a design centred around the rainbow roller skates and 'here comes the sun' sunglasses stickers. Method for paintingYou will need: acrylic paints; a palette to put your paints on (if you don’t have one, a paper plate is a good substitute! Or if you use a china plate just be sure to rinse off the paint while wet. It’s a bugger to get clean once the paint has dried!); paintbrushes; pencil; stickers; E6000 glue (this isn't essential but I found my stickers kept peeling away without a strong adhesive to help fix them more securely); and some art gesso primer (the primer is optional but it helps the paint to coat better rather than trying to paint on the shiny surface of the pumpkin. Mod Podge would probably work if you have some in your craft stash to save buying new materials). 1. Paint on your primer, covering the whole pumpkin. Allow to dry completely. 2. Using a pencil, draw your design onto your pumpkin. For mine, I only needed to draw out my sun. 3. Paint the background. I chose a light purple for mine as per Liz Harry’s example. 4. Draw on any features or finishing touches. For mine I added a little smile and a nose on the sun. And ‘keep going’ and ‘keep rolling’ to the skates. Which is a nod towards Leona Thrift Ola’s Indie Rollercoaster group on Facebook. Of which I’m a member of her Make it Happen group. I pay a membership fee for this invaluable community. Her website for Make It Happen will launch in January 2019, I’ll update this space with a link once it’s all up and running! 5. Cover any leftover empty space with your stickers. Use some strong glue such as the E6000 to help them stick more securely. Flat stickers are best, the puffy ones I used were not particularly suitable! But aesthetically they were the best stickers I had to go with Liz’s! And here is the finished article! I also painted the three crosses design for a combination of carved and painted. I didn’t put any primer on so you can see the difference between painting straight on the pumpkin surface or with the primer. Not to mention the fact I was feeling impatient while I waited for the primer to dry on the other pumpkin! So thought I’d just crack on with it. I think it looks much better painted as it really highlights the cross design. I also couldn’t resist adding some hearts to the crosses. After all, the cross for me represents God’s Father heart of love. The whole thing of loving us enough to send His one and only son to bear our burdens. Woop woop! That certainly calls for celebration in joining in Halloween as another excuse to shout about my faith! So what do you think? What do you think looks best? Painting, carving or a combination of both? How did you decorate your pumpkins this year? Please do leave a comment or drop me an email with your designs. I’d love to feature my favourites over on Instagram! Which, if you’re not following me on there, I’m @just_creative_julia. I look forward to hearing from you! Happy Halloween!
0 Comments
Leave a Reply. |
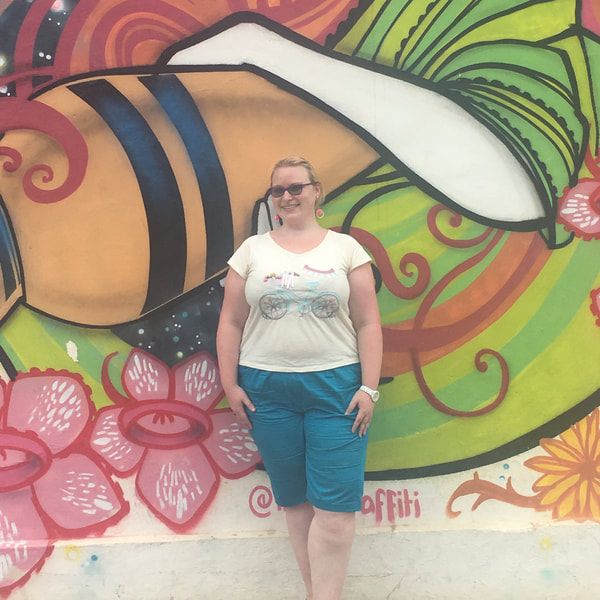
Hello there!I'm Julia, Just Creative Julia, jolly pleased to meet you! Welcome to my creative lifestyle blog, established 2014. My creative journey in discovering my authentic self as a neurodivergent woman.
Embracing the Neuro Spicy! Here you will find many different topics centring around creativity, deep thoughts, mental health, food and more. Archives
May 2024
Categories
All
|






 RSS Feed


